• Blog
  • LDS
    • Canada
    • Japan
    • U.K.
    • U.S.
    • World
    • Politicians
  • Site
    • About
    • Archive
    • Best of Rickety
    • Comments Policy
    • Copyright
    • FAQ
    • Feedback
    • Guests
    • Privacy Policy
    • Technical
    • Why Blog?
  • Sundry
    • Comics
    • HyperCheese Help
    • JFHE
    • Projects
      • Book of Mormon
    • Wishful Thinking

Rickety

Mostly about Utah

  • Family
    • Jill
    • Rick
    • Children
      • Daniel
      • Jake
      • Paul
      • Sarah
      • Steven
    • Children’s Spouses
      • Adelaide
      • Derek
      • Megan
      • Rachel
      • Shelese
    • Grandchildren
      • Aurora
      • Benjamin
      • Bryson
      • Caleb
      • Calvin
      • Cassandra
      • Elizabeth
      • Ezra
      • Helen
      • Jameson
      • Ryan
      • Sadie
  • Finance
    • Bank Rewards Checking
    • Credit Union Rewards Checking
    • Debt
    • Employment
    • Money
    • Rewards Checking Posts
  • Government
    • City
    • Elections
    • Federal
    • Military
    • Paul on Politics
    • Politics
    • States
    • Taxes
  • Recreation
    • Competition
    • Food
    • Fun in Utah
    • Games
    • Music
    • Parade
    • Sports
    • Travel
  • Religion
    • Christmas
    • Family History
    • Jesus Christ
    • LDS
    • Marriage
    • Missionary
    • On Religion
    • Preparedness
    • Scriptures
    • Temple
  • Series
    • 100 Years Ago
    • Christmas Letter
    • Epic Excerpts
    • On Religion
    • Past Pictures
    • Daniel’s Mission
    • Jake’s Mission
    • Paul’s Mission
  • Technology
    • Applications
    • Blogging
    • Communication
    • Computer
    • Energy
    • Environment
    • How To
    • Photography
    • Population
    • Transportation

Retiling the Bathroom

September 6, 2008 by rickety 16 Comments

Versions prior to Internet Explorer 8 do not render the borders correctly. Try using FireFox.

The bathroom off of the master bedroom needed the rickety old linoleum floor replacing. Two of my sons volunteered to lay the tile. Follow their work in this photographic record.

Remove Linoleum

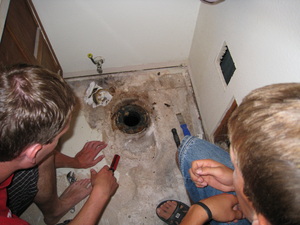
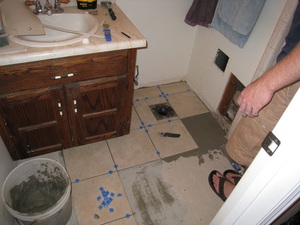
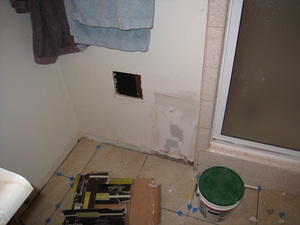
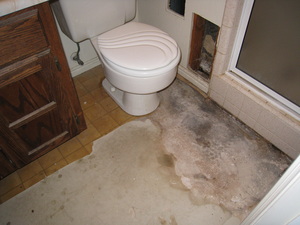
The large hole in the side of the wall was where I cut the sheetrock to find out where the shower was leaking. The smaller hole in the wall is for the toilet roll holder.

The first job is to strip the linoleum. This doesn’t take very long and could be fun if you are in the right frame of mind.

Remove Toilet

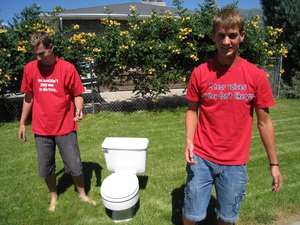
Paul (left) and Daniel (right) unbolt the toilet and take it outside. We now have an outside toilet for a few days. Not to worry, we do have an operational second bathroom. After all it is America.

Paul’s shirt says, “You couldn’t pay me to do this.” Correct, you won’t be paid. Daniel’s shirt says, “I hear voices and they don’t like you.” My shirt says, “Get back to work!”

Finish Removing Linoleum

The rest of the linoleum is removed. I was expecting a smell from the sewer but I was pleasantly surprised when there was none. Of course I wasn’t as close to the action as were Paul and Daniel. Occasionally I came in to take photographs — you know the important stuff.

Remove the Subfloor

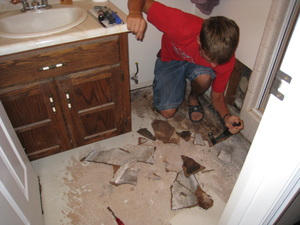
Daniel works on removing the subfloor. This is a little more labor than removing the linoleum but it is soon completed. This project took several days to complete because Daniel digs post holes during the day and Paul was in college. However there were no complaints. Expert craftsman need their space.

Now it is time to stop removing and begin adding.
Lay Plywood Subfloor

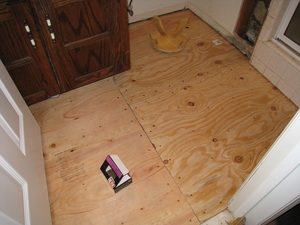
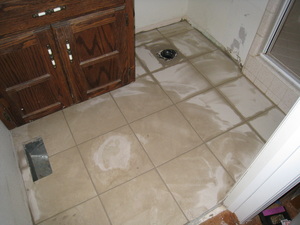
3/8 inch plywood is brought in to replace the subfloor that was removed. It is screwed down firmly. The boys made sure to cut out the hole for the heating vent. In the photograph it looks like they forgot about the hole for the toilet but what you see is just an upside down wooden stool.

Smooth the Floor

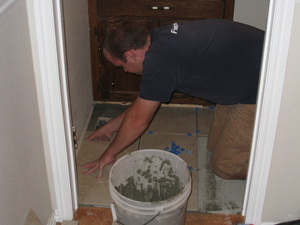
The door has been removed for better access to the work area. This is something that could have been done earlier. Next thin-set mortar is spread out so that the floor is very flat and smooth. The area where the toilet will go still needs to have mortar laid.

Lay Cement Board

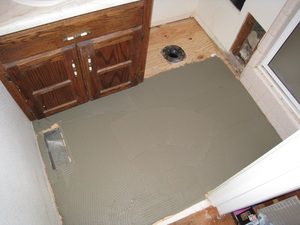
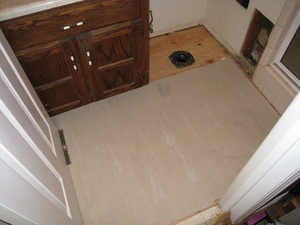
Test fit your 1/4 inch cement board before laying your mortar. The cement board goes on top of the mortar. Cement board is a combination of cement and glass fibers formed into sheets. Cement board can be nailed or screwed to plywood for tile floors. Cement board is not actually waterproof but it is highly resistant to absorbing moisture and has excellent drying properties.

Finish New Floor

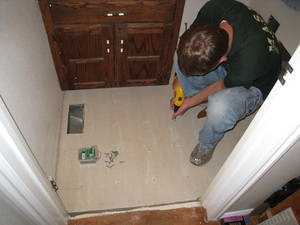
Paul is finishing up the floor by inserting a few more screws. It will soon be time to lay the tile. When the project is finished it is going to look really good.

Lay the Tile

Paul drafted his friend Jake C to head up laying the the tile. By spreading the mortar as needed and making sure the tiles are aligned correctly the job goes smoothly. Paul cut the tiles to fit while Jake C laid them. We call him Jake C to distinguish him from our own Jake.

Fitting the Tile

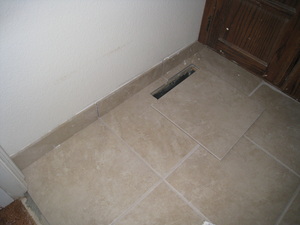
Fitting the tile around the heating vent took some time and a few broken tiles. Here Jake C skilfully lays the tiles. A superb craftsmen, he is the man to have on your project, Bred in a family of hard workers his tirelessness and focus is renowned.

Use Tile Spacers

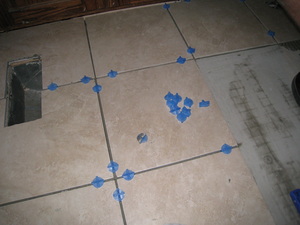
The process of laying tiles typically involves positioning tiles individually on to a surface to which an adhesive or some form of mortar has previously been applied. When the tiles are being positioned, tile spacers are used to assist in aligning the tiles relative to each other and to provide consistent inter-tile spacing. In use, such tile spacers are inserted between the tiles at the intersection defined by four tile corners.

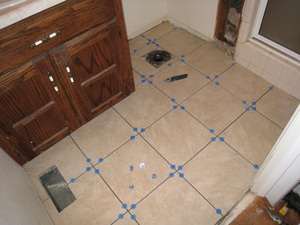
Floor Tiles All Laid

The project is nearing completion. There are still a few things left to do and then we will get our bathroom back. It is worth the wait.

Patch the Wall

Putting my camera down it is finally time for my contribution. I patched the wall by the left side of the shower and also on the right side (not shown). I am an expert at this having repaired holes in sheetrock a number of times. With four boys you do not have to ask what caused the holes.

Grouting

The tiles are grouted and then sealed. We still have to tile around the base of the wall.

Jake C

The famous Jake C. He is generally shy of cameras but this time I convinced him to let me take a picture. We all appreciate his help on the project. Jake C, tiler extraordinaire.

Tiling around the Base

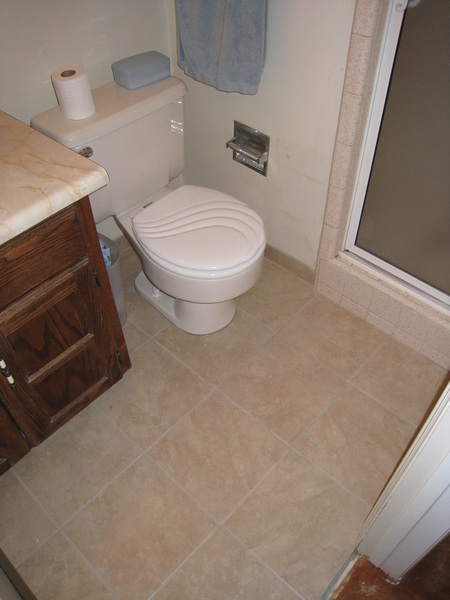
These base tiles cost more than twice as much as the floor tile, All you get is one curved edge which of course is all you need. It is worth the extra cost because it looks really good when it is finished. All that needs to be done is to attach the toilet back where it belongs.


Rickety signature.

Filed Under: How To Tagged With: Bathroom, Floor, Tile

Comments

  1. Jake says

    September 6, 2008 at 7:06 pm

    It is nice to see process and how much work it takes to do a job like this. What was the total cost? How much would it of cost to have paid workers install it?

    Reply
  2. rickety says

    September 6, 2008 at 8:11 pm

    It cost about $200 for the materials. We once had a builder offer to do both bathrooms for $1,000.

    Reply
  3. Sarah says

    September 8, 2008 at 8:43 am

    I find Paul’s red shirt text to be quite funny.

    Reply
  4. rickety says

    September 8, 2008 at 3:17 pm

    Some people say that Paul isn’t funny but his clothes certainly are.

    Reply
  5. wood deck tile says

    December 26, 2008 at 12:47 pm

    was surfing around for deck tile tutorials online and I found your blog and I love this post…thanks! I have a friend that sells deck tiles you really should check out their stuff…it’s just about as easy to install as the tiles on your bathroom.

    Reply
  6. rickety says

    December 26, 2008 at 5:12 pm

    Thanks for the tip. We do have another bathroom to tile.

    Reply
  7. Anon says

    January 8, 2009 at 8:05 am

    I am retiling my bathroom, but we have a window. what is the best way to cover the window?

    Reply
  8. rickety says

    January 8, 2009 at 4:35 pm

    When it comes to tiling we are just amateurs. We made it up as we went along. Do you want to cover the window to keep it clean or cover the window as in wall it in? The former I would just cover it over with whatever is available and the latter I’ve never had to do. Maybe you could post a comment on a blog where the guy can do more than take fancy photographs.

    Reply
  9. Dan says

    November 24, 2009 at 8:28 pm

    Looks good guys. Just one note- I don’t see any caulk around the base of the toilet… I would recommend doing so or water from the shower (or small children) will quickly rot the subfloor without it.

    Reply
    • rickety says

      November 24, 2009 at 8:39 pm

      Thanks for the advice. I just went and checked and they used some clear silicone to seal it. I don’t know if that is the correct procedure.

      Reply
  10. Anon says

    June 6, 2010 at 9:50 pm

    But now a days there are some chemicals for increasing the glancing of old tiles.

    Reply
  11. Eric says

    August 22, 2010 at 5:37 pm

    For future reference, you can use nails or screws as tile spacers. A lot cheaper and gets the job done the same way! But other than that, the bathroom looks great!

    Reply
  12. Joey says

    October 27, 2010 at 6:17 am

    Love the post Rick, it does an awesome job of showing the whole bathroom remodeling process you went through beginning to end. And of course the joy of having sons is that you can put them to work on projects like these (arguably not the only joy).

    Being in the bathroom renovations business personally my sons were “enjoyed” many such projects. They say they hated it at the time but today they’re actually happy they have the know-how for this kind of work, even though they’re both working in completely unrelated fields to mine.

    Joey from Bathroom Options

    Reply
  13. Rays Flooring Albuquerque says

    February 16, 2011 at 6:58 pm

    I like this Rickety site very much. I wanted to thank you for this post about replacing tile flooring in the bathroom. You did a great job with it!

    I’d like to start a blog like this giving similar tips for other types of flooring for my local area in Albuquerque.

    One thing I really appreciated was the step-by-step images you had going through the post.

    Thanks

    Reply
  14. Josephine Collen says

    February 23, 2011 at 5:08 am

    Nice bathroom makeover, especially laying the floor tile. I have done that floor tiling lately. it is such a hectic work.

    Reply
  15. Flooring Mark says

    February 23, 2011 at 1:48 pm

    So one can save 800 bucks if they did it themselves. Good post!

    Reply

Leave a Reply Cancel reply

Your email address will not be published. Required fields are marked *

Recent Comments

  • Anonymous on One Hundred Thousand Milpengo
  • Jeremy McMullin on Mesa Easter Pageant – Jesus The Christ
  • Genma Vincent on George W Bush on Religion
  • Anonymous on The Twelve Stones of The Apocalypse
  • Judy Crowe on Ten Artists Paint Old Testament Women
  • Angela on The Twelve Stones of The Apocalypse
  • Angela on The Twelve Stones of The Apocalypse
  • AllHailKingJesus on The Twelve Stones of The Apocalypse
  • Microwave guy on Make a Halloween Costume from a Microwave Oven
  • Anonymous on Arduino AVR High-Voltage Serial Programmer

Who is this Rickety?

Rick at homeI'm Rick Willoughby. I live in Utah, a retired Software Engineer. I'm a Mormon, married with 5 children and 12 grandchildren.

I emigrated from England in my late twenties, bringing with me one small suitcase and a few dollars. I appreciate the opportunities America has given me and the friendliness of the people to new citizens.

I blog about my family as well as politics, religion, finance, technology, and other topics.

Copyright © 2025 · Lifestyle Pro Theme on Genesis Framework · WordPress · Log in